
In Studio - October 2022

Here we are in October already! It’s so hard to believe the year is almost over. It’s now been a year since we started planning to leave Hawaii to move back to Alaska. It’s truly crazy how time goes faster the older I get.
I wanted to share a picture of the road that leads to where we’re living right now. We have another move in our future, but not for another few months. Thankfully, our new house will be just one house over from where we are living now. This is such a lovely area. Quiet and peaceful with lots of wildlife. I’m sure you’ve noticed if you follow me on Instagram.
I call this the Tunnel of Gold. It’s everywhere this time of year. I know there are glorious fall season’s going on all over the country. It’s a time for the land to rest and rejuvenate for the spring. It’s a time to enjoy the color and the color combinations.
I love fall. I missed it so much while living in Hawaii. I didn’t know how much until now. The air is crisp and clean. I feel invigorated!

This month’s blog
Is a custom quilt I created. Yes, I’m working on the pattern. Yes, I’ll let you know when it’s available!
Where the planning began

My client wanted a quilt made for her mother. As always, a string of questions ensued. She’s such an adorable young lady and I suspected she had some deep insights into her mother’s wishes. Sure enough, she had a picture her mother had saved from a magazine of a quilt with spools. Then she let out that windmills and pinwheels were favorites of her mothers.
And the planning began! When I asked about colors and found out that lavender and teal were fav’s. Then my client tells me they have a bunch of fabrics on hand that mom loves. I told her to send them to me and I would get those fabrics incorporated into the quilt. The end resulted in two materials contributed by me. The lavender border and the binding and the brown spool tops and bottoms.
When I got her box with all the fabrics, it was like a little party in my studio! I had so much fun sorting, and planning the blocks.
I love it when a quilt comes together!
Now it was time to fit the bits and pieces into where they would work in the quilt. The Windmill blocks were small pieces so it was pretty obvious there wasn’t much needed there. I knew I could split the purples/lavenders between the Pinwheels and the windmills. Since there were quite as many teals and the contrast in the Pinwheels was necessary, I split those into the Pinwheels and the spool blocks.
(BE SURE TO READ TO THE END OF THIS BLOG, ANSWER A COUPLE OF QUESTIONS ABOUT THIS PICTURE, AND SAVE SOME MONEY!)
With everything laid out into piles, I started cutting. I really should have taken a LOT of pictures of cutting. But I didn’t. I was in a time crunch after all! This client had already been waiting for her place in the quilt queue and then for me to move.
Yada…yada…yada…
I was in a zone and had no time for a lot of pictures!
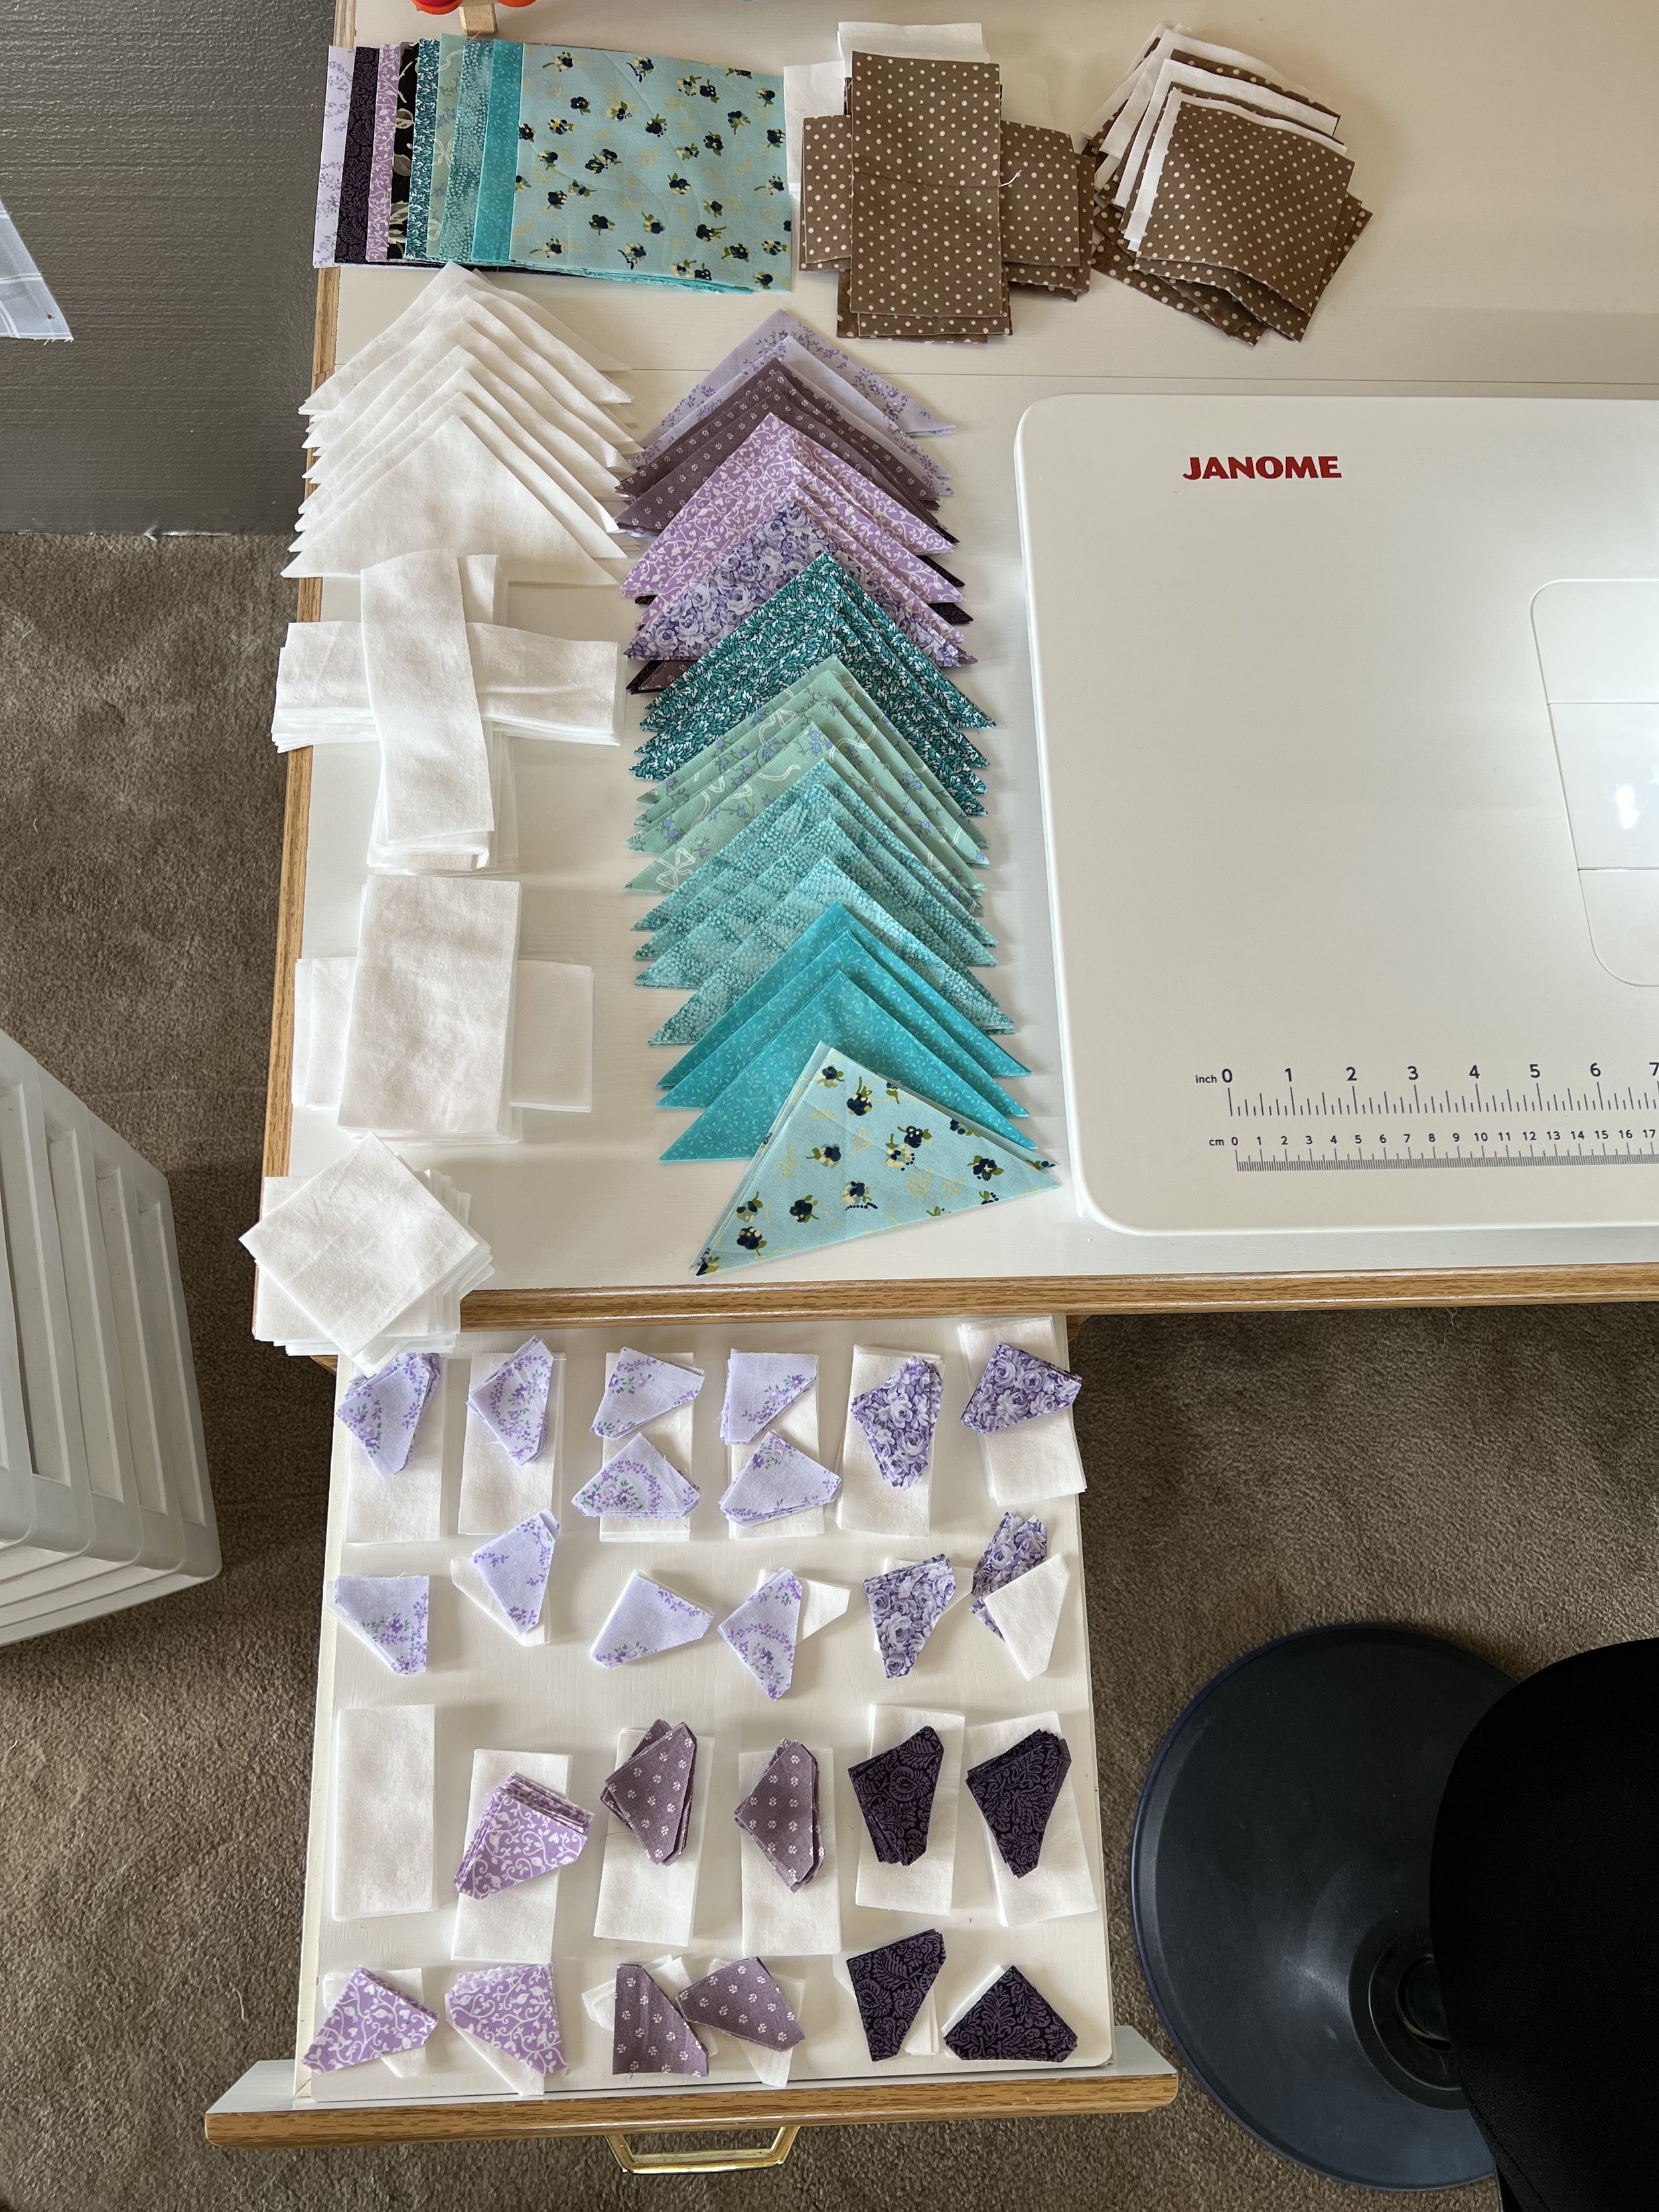
I did snap this picture as I was starting to put the blocks together.
Yes, there are a lot of little pieces for the Windmill blocks. Yes, they are all triangles. No, it wasn’t hard. Actually, I feel like the tiny triangles are easier. Less room to stretch the bias cut side.
And I cheated.
I have an AccuQuilt (check them out here) die-cutting system and I have a die for these tiny triangles (click here to see what that die looks like)!
It was so easy! I layered my lavender fabric with the white background and TA-DA! I had the centers of the Windmill block. Then ran a few more lavenders through the cutter to get the triangle tips of the Windmill block.
Unfortunately, I didn’t have the dies for the rest of the block, but I do see investments in my future!
As you can see in this photo, I have all the pieces laid out for the Windmill blocks, the Pinwheel blocks, and the Spool blocks.
Next time, I would like to talk a bit more about the construction of the Windmill block. I’d love to give you a bit of insight into my process. And maybe it will help you when you decide to create this quilt yourself.
Now…Let’s have a bit of fun
You could save some money….

Compare the picture of the cut blocks picture and the finished quilt picture.
What blocks haven’t been mentioned yet?
Any ideas why I haven’t mentioned them yet?
Tell me what you think in the comments section below.
Correct answers to Question 1 will get a 5% off coupon on longarm quilting services!
Bonus: Guess correctly on Questions 1 AND 2 and get a 10% off coupon on longarm quilting services!
See! I said it would save you a bit of money!
Thank you so much for reading this fine October day! And thank you for sticking around. I really am trying to get more blog posts out to you. Life has been in such an uproar! Writing these posts is peaceful for me, but there hasn’t been much time for peace these days.
I’m looking forward to adding another post per month. (WHAT! Twice a month??) Perhaps, breaking into some more in-depth instructions.
What would you like to know more about how I do what I do, please mention it in the comments below. Or skim a bit through my Instagram feed, if you see something you want to know more about, mention that too!
Much love,
Carolyn